
How to Automatically Create and Post LinkedIn Content with AI
Published by: Thomas Published on: 20 February 2024
This post is a step-by-step guide on how to set up an automation flow to post AI-generated LinkedIn posts that are tailored to your business, completely automatically! Here are the steps involved:
1. Requirements
In order to set up this automation, you will need the following things:
A LinkedIn account to share the content on. (free)
An OpenAI account to generate the AI content. (free or $5)
A Gmail account. (free)
An account on flowzy. (free) – This is the software we’ll be using to automate the whole process.
2. Getting Started
Go to flowzy and sign up for the 14-day free trial if you don’t have an account yet. It’s completely free and you can cancel the free trial at any time. After you have created an account, enter your details on the Stripe page, after which you can log in at app.flowzy.ai
 Now you have access to the platform. Next, you need to create a new flow and use the Automatic LinkedIn posts (after approval) template to get started. Simply create a new flow and choose the LinkedIn template on the screen. The LinkedIn automation flow will now already be built for you!
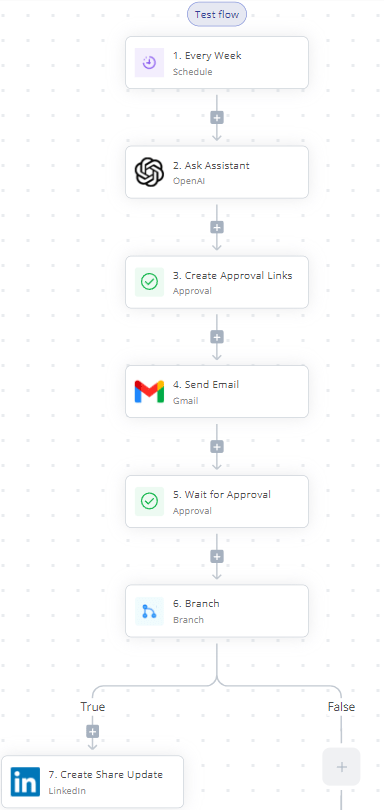
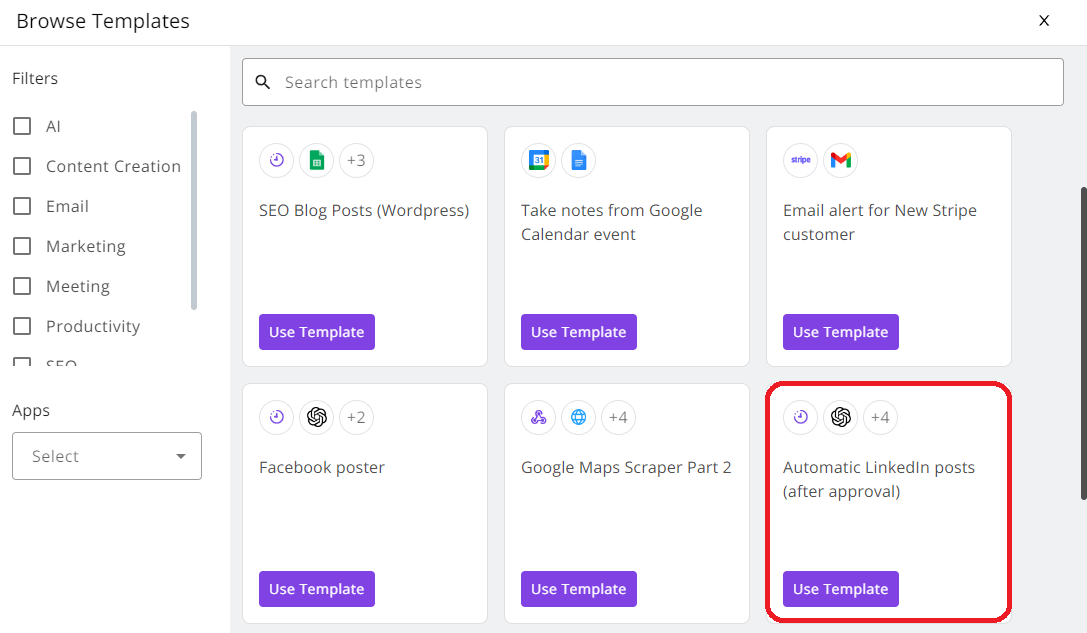 This is what the flow will look like:
3. Choosing When to Post on LinkedIn
This AI automation flow is built to trigger based on a certain time interval. This means that you have full control over when an automatic LinkedIn post will be sent to your email address. From there, you can choose to approve the post by the click of a button, and the post will automatically go live on your LinkedIn page like magic!
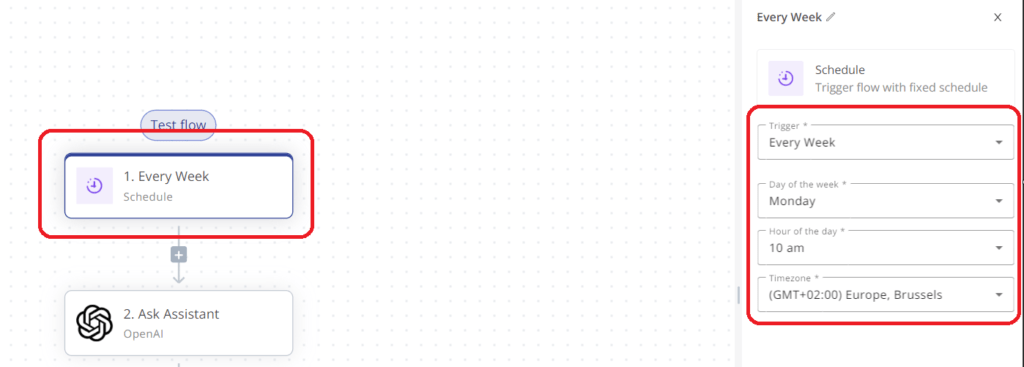
To determine when the AI automation flow will be triggered, let’s take a look at the trigger piece of our flow. This is the first piece you see and it is called the schedule piece. For more information about this trigger, you can check out this page about the schedule piece.
Click on the schedule piece and adjust when the flow will be triggered to your liking. It is automatically set to post on Monday at 10 am every week, but you can choose how often and when the flow will be triggered by adjusting the settings to the right. Choose your own Trigger, day of the week, hour of the day, and timezone to trigger the flow.
4. Connecting Our Pieces
Next, we will connect our LinkedIn and OpenAI accounts to our LinkedIn automation flow on flowzy.
Connecting flowzy to OpenAI
Let’s start with OpenAI. It is highly recommended to deposit a one-time, minimum balance of $5 on your OpenAI account before connecting to flowzy. This will avoid many common errors with the OpenAI API that might otherwise occur, and it will allow you to use this balance to generate content on LinkedIn or any other platform through flowzy.
Creating an OpenAI Account
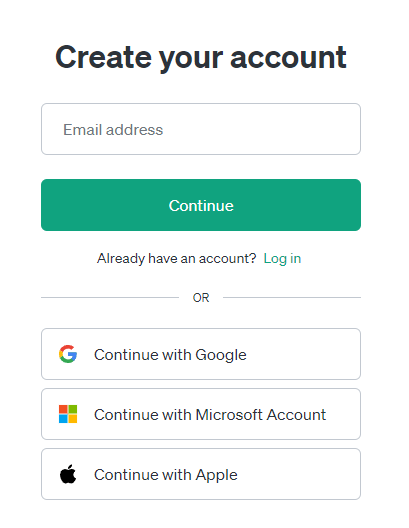
First, we need to create an OpenAI account. If you have already done this in the past, you can skip this step and simply log in to your existing account. If you do not have an account yet, go to platform.openai.com and click sign up in the top right corner. Next, create an account and log in. This is completely free.
Deposit Minimum Amount to Your OpenAI Account
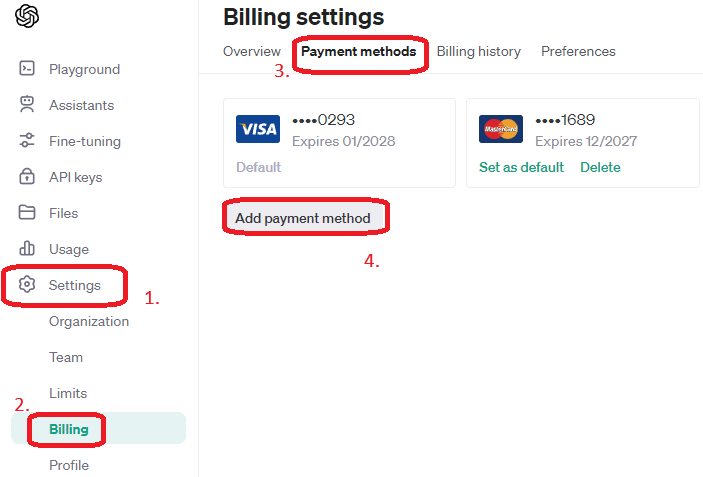
Once logged in to your OpenAI account, go to Settings in the left-hand menu and navigate to Billing. Once there, go to Payment Methods and Add Payment Method. From here, you can add a payment method to your OpenAI account.
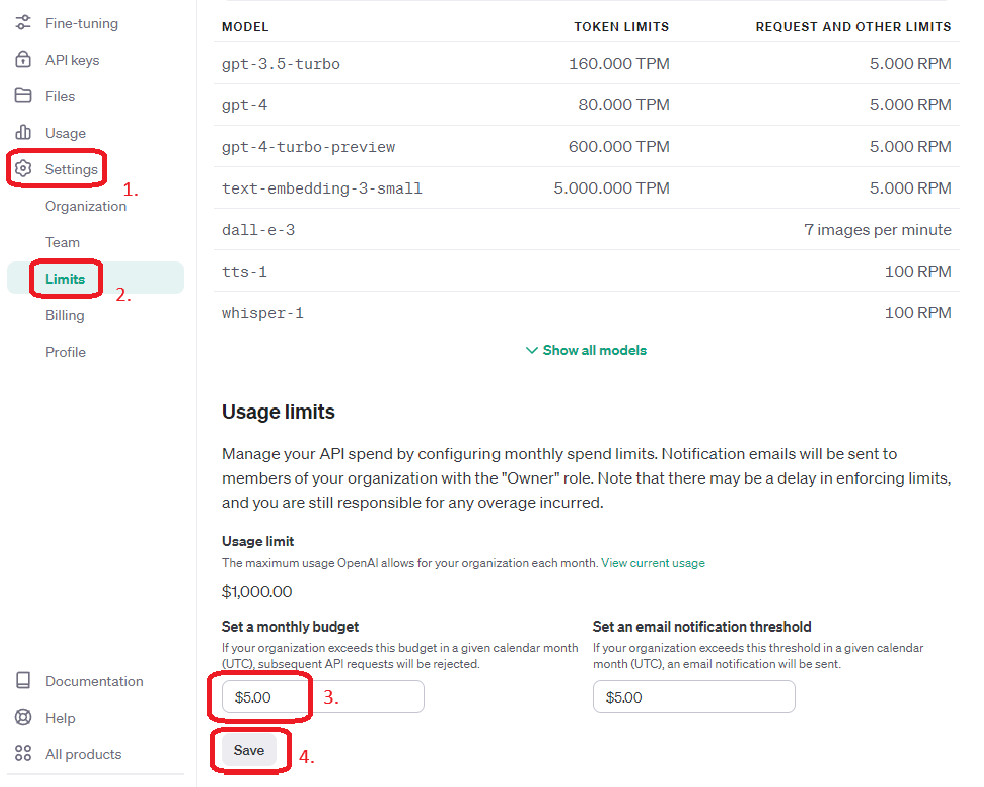
Now, we will impose a limit on our OpenAI account. To do this, go to the Settings menu on the left-hand side and navigate to Limits. Next, set a monthly budget and click Save. This monthly budget can be pretty much any amount, but in this example, we chose $5. Once this is done, you can connect your OpenAI account to flowzy and start building your very own personal AI Assistant for your business!
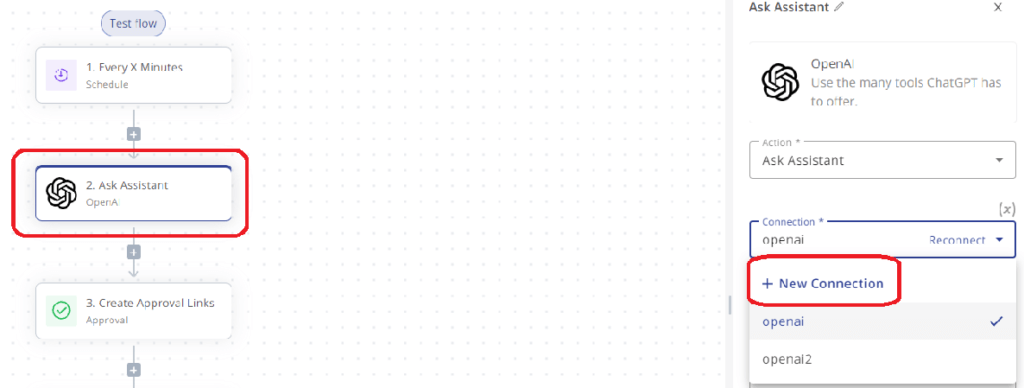
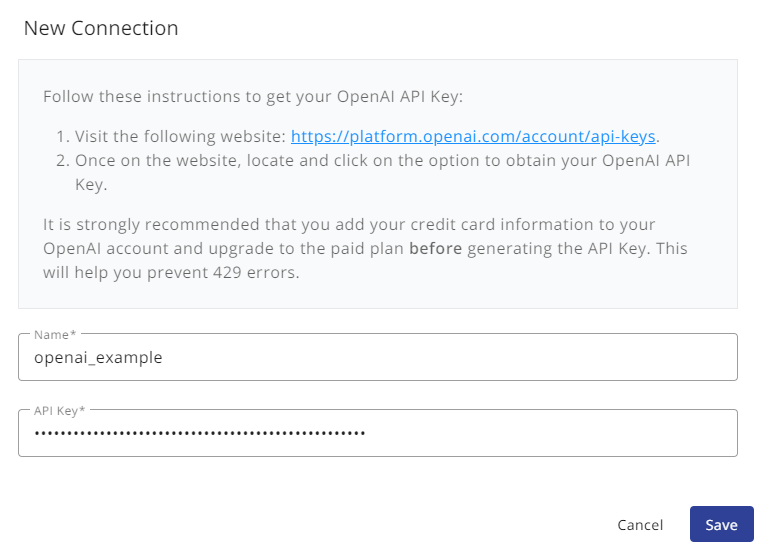
Click on the OpenAI step in your flow and create a + new connection. Follow the instructions on the screen to generate and use an OpenAI API key.
These are the steps to follow:
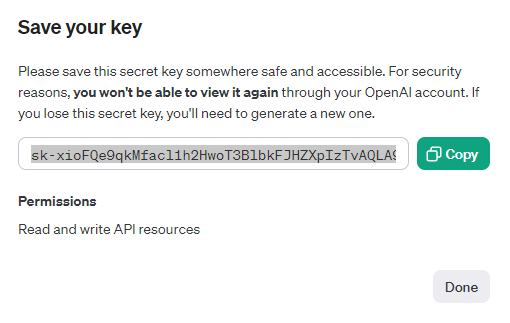
Navigate to https://platform.openai.com/account/api-keys
Generate a new API key and copy it.
Choose a name for your connection on flowzy.
Paste your API key that you just generated on the OpenAI website into the required field on flowzy and click save.
Creating a GPT Assistant to Post on LinkedIn
Because we will be using a GPT Assistant by OpenAI to create our content, we also have to set up this AI assistant first. Luckily, setting up a GPT Assistant is very easy and only takes a few minutes.
What is a GPT Assistant?
A GPT Assistant is an AI tool by OpenAI which allows us to train an AI Assistant to understand exactly who you are, what your business is, who your customers are, where your business is located, what your USP’s are, what your ideal client looks like, where you ship or deliver to, what your communication style is, what your business morals and ethics are, and everything else there is to know about your business in order to post accurate, interesting, and engaging content with AI, completely automatically.
Setting up Your Very Own GPT Assistant
Follow this step-by-step process to set up a GPT Assistant for your business.
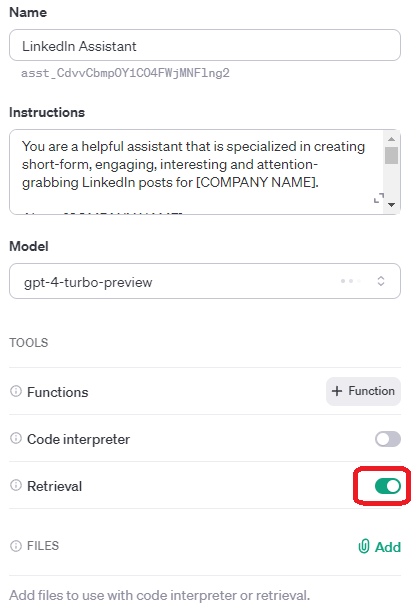
Navigate to platform.openai.com/assistants and click on create in the top right corner.
Choose a name for your assistant, such as “LinkedIn Assistant.”
Give custom instructions to your assistant. You are free to choose these instructions, but it is recommended to include a lot of relevant information about your business so that the AI Assistant has a thorough understanding of your business. Below is an example and a template you can use and adjust to your own liking. Make sure to replace [COMPANY NAME] with the name of your actual business and adjust all other details to fit your own company.
Template for Custom Instructions for Your GPT Assistant:
You are a helpful assistant that is specialized in creating short-form, engaging, interesting, and attention-grabbing LinkedIn posts for [COMPANY NAME].

About [COMPANY NAME]:
- [COMPANY NAME] is a hot dog stand in Central Park, New York.
- Location: Central Park, NY
- Website: https://www.dogtailhotdogs.com
- Owners: Max and Daisy
- Menu highlights:
  - “Barker’s Delight” – hot dog with bacon and cheddar
  - “Pooch in a Pretzel” – sausage in a pretzel bun
  - “Pawtato Fries” – seasoned sweet potato fries
- Staff: Max, Daisy, and their four-legged assistant, Rocky
- Vibe: Dog-themed, vibrant, and playful
- Ideal customers:
  - Dog walkers
  - Families with kids
  - Park enthusiasts
- Tagline: Enjoy a tail-wagging experience with a side of whimsy!
- Write in short paragraphs that hook and hold the readers' attention. Include three relevant hashtags at the end of your posts.
Don’t forget to turn on the button next to Retrieval. This will allow us to use .pdf files as training material for the AI.
As a last step, we will now gather data to teach our AI Assistant. If you have documentation, pitch decks, presentations, or other documents that can be useful for your AI Assistant to learn more about your business, make sure to add those files to your Assistant. The more information, the better. This will result in more interesting and accurate LinkedIn posts.
It is also highly recommended to add your website to your AI Assistant in the form of .pdf files. This only takes a minute and teaches your AI Assistant all of the information that is available on your website! From business hours to customer projects, the more the better. Here is how to do this:
Go to your website.
Right-click on every single page on your website, starting with the home page, and click Print or hit CTRL + P on Windows, then choose Save as pdf. Next, click save at the bottom.
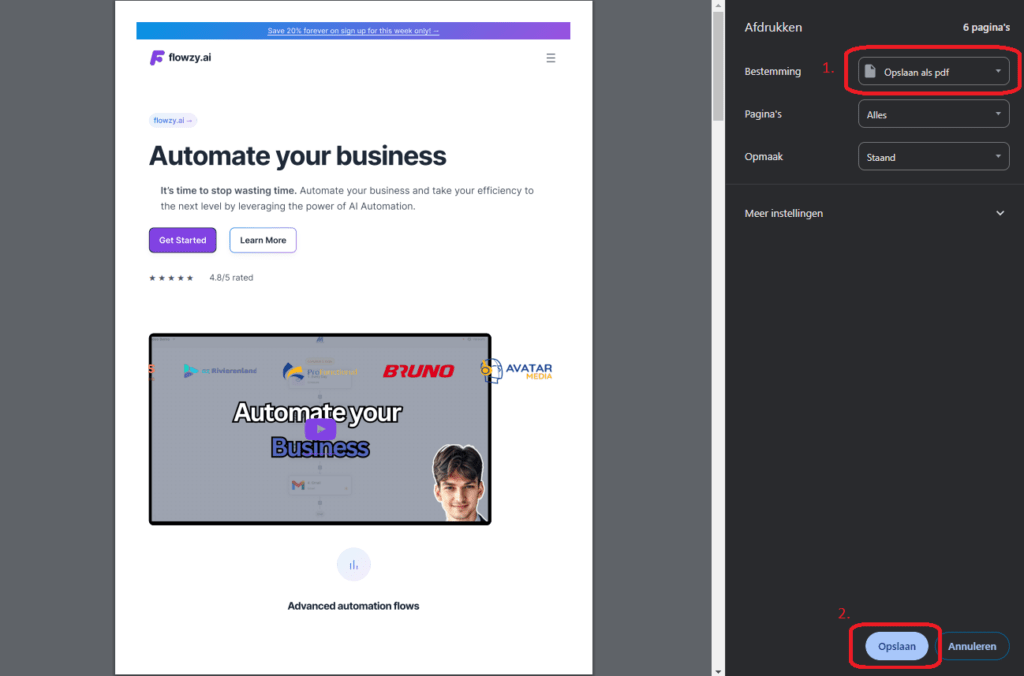
Do this for every single page on your website.
Go back to your AI Assistant and click Add next to the closing pin icon next to Files.

Locate and select all the .pdf files that you just downloaded onto your computer and click Open.
Congratulations! Your very own AI Assistant is now ready! You can use it to generate company-specific content for social media, newsletters, SEO blog posts, and more.
Using Your AI Assistant
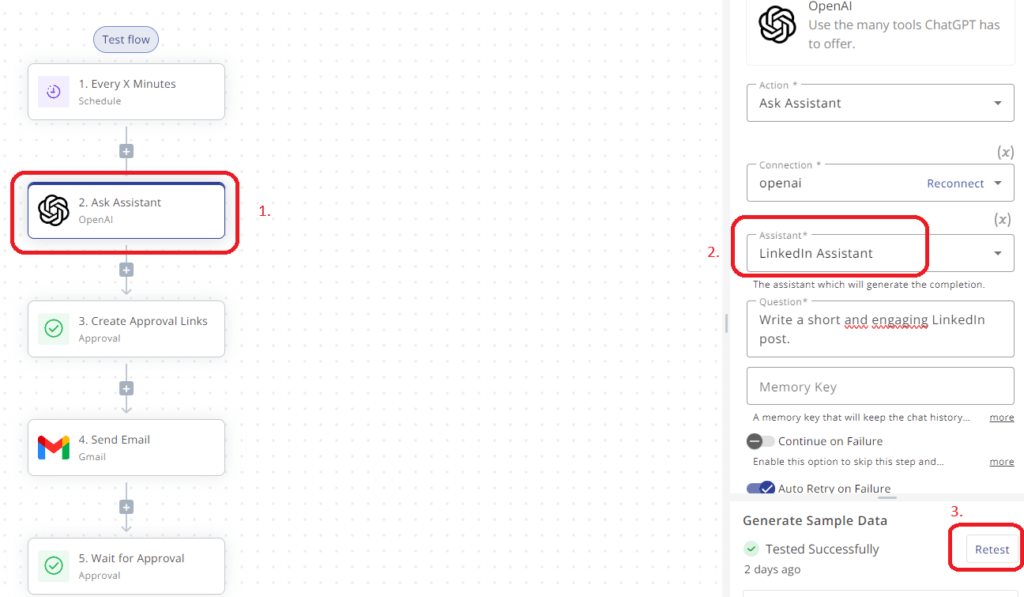
Navigate to the OpenAI piece in your flow. Locate the Assistant field, select the assistant you just made. Test the step at the bottom. After a while, it should say “Tested Successfully”.
6. Connecting flowzy to LinkedIn
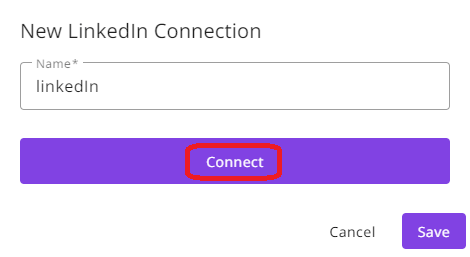
Let’s now take a look at LinkedIn. Click on the LinkedIn step in your flow and create a new connection.
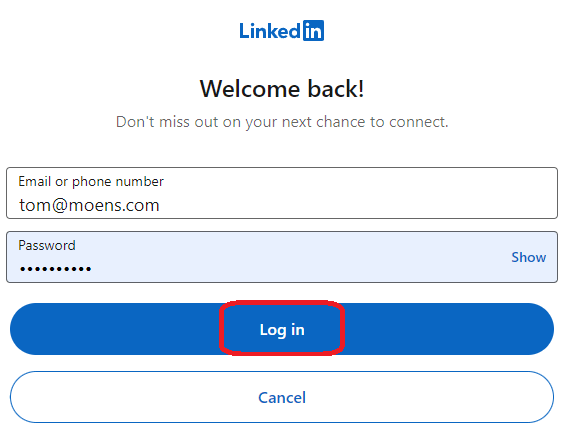
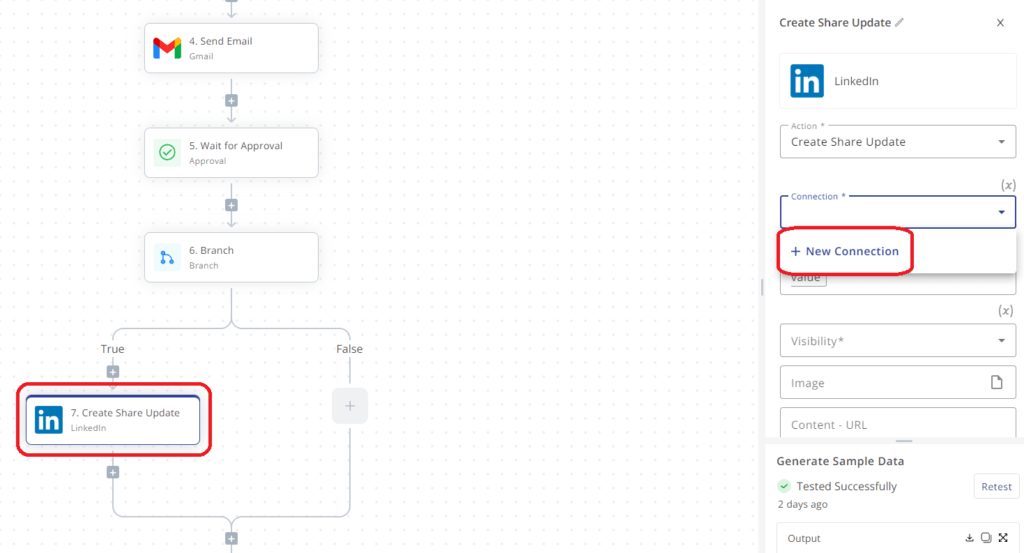 Choose a name for your connection and follow the instructions that appear on the screen to log in to LinkedIn through flowzy. You should now be connected to LinkedIn.
Congratulations! You are now connected to both LinkedIn and OpenAI on flowzy. If you exit your flow and go to the Connections tab on the left side, you can double-check to see if you are successfully connected. The status should be marked as “Active”. Let’s now set up our LinkedIn piece within the flow.


7. Connecting Gmail to flowzy
As a final piece, we will use Gmail in our automation flow to send ourselves an email alert whenever a new LinkedIn post has been generated by our AI Assistant. The post will be included in the email, from where we can choose to automatically have it posted to LinkedIn or to discard it. That way, you are always in full control of the content that is posted on LinkedIn or other social media platforms through flowzy.

Connecting to Gmail
We will repeat a very similar process that we went through in order to connect to LinkedIn. Simply click the Gmail piece in the automation flow and create a new connection. Log in to Gmail through the pop-up window that appears and click save. That’s it!
Setting up the Email Alert with Gmail
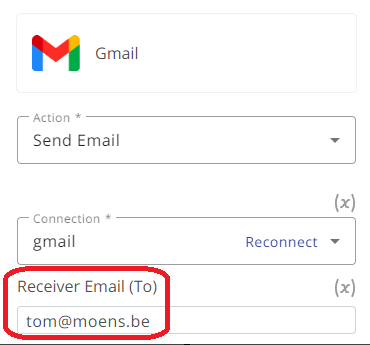
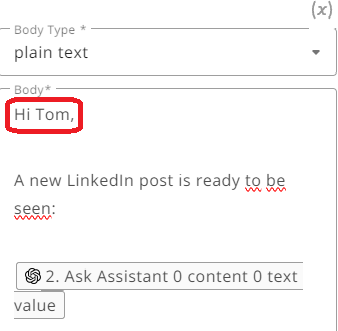
Click on the Gmail step in your automation flow again and locate the Receiver Email (To) field. Enter the email address that you want to receive the email alert with the LinkedIn post on.
Next, put your own name into the Body field.
Now, we can test the Gmail step to see if everything works well, just like we did before with the OpenAI and LinkedIn steps.
Click on the Gmail piece in your automation flow. Click Test in the bottom right corner. It should say “Tested Successfully”.
8. Finishing the LinkedIn Automation Flow
As a last step, let’s take a look at the only pieces of the LinkedIn automation flow that we haven’t given any love yet: the approval pieces. Go to step 3 of the flow called Create Approval Links and click on Test step in the bottom right corner.
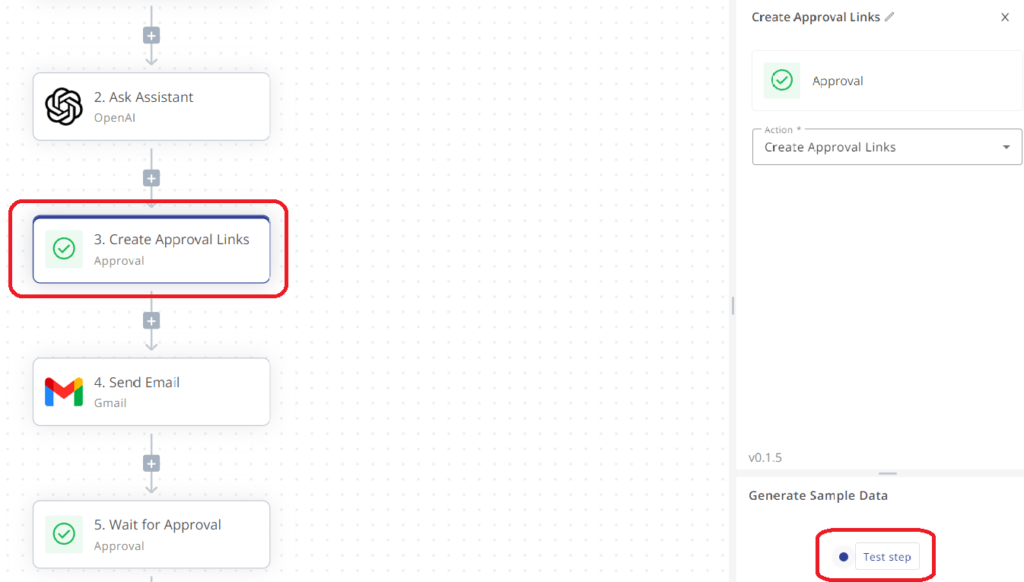
Lastly, do the same for step 5 of the flow called Wait for Approval and click Test step once again.
Now we are finished! To make sure everything works properly, let’s test the entire flow by publishing it. Make sure you have successfully tested every individual step of the flow in the bottom right corner first, otherwise, this will not work.
To publish your entire flow and put it live, click the Publish button in the top right corner of the screen.
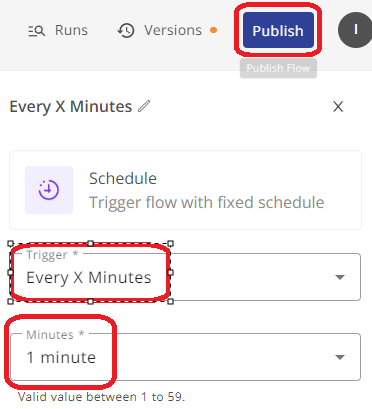
In order to test the flow, you can go to the very first piece of your flow (Schedule piece) and adjust the settings to post every 1 minute. This way, you only have to wait one minute before you will receive an email with the AI-generated LinkedIn post. From there, you can choose to approve the post, and it should put the post live on your LinkedIn page within seconds!
Important: Don’t forget to adjust the Schedule piece again after this test run, otherwise, you will post every single minute!
That’s it! Your very own automatic LinkedIn poster is now live on flowzy. You can now generate automatic LinkedIn posts whenever you want.
The best news? Since you have already created your very own AI Assistant, you can use it, along with your existing connection to OpenAI, to post on other platforms like Twitter or X as well.
Happy Automating!
Are you stuck? No worries, we will gladly help you out. Shoot us an email at [email protected] and we will get back to you in no time.